Glacier Bay 873-0016 Installation Guide

Browse online or download Installation Guide for Sanitary ware Glacier Bay 873-0016. Glacier Bay 873-0016 Installation Guide User Manual

  • Download
  • Add to my manuals
  • Print
  • Page
    / 7
  • Table of contents
  • BOOKMARKS
  • Rated. / 5. Based on customer reviews
Page view 0
Masilla para Tuberías
Mastic de plombier
Plumber's Putty
Sealant Tape
Cinta Selladora
Ruban d'étanchéité
Wrench
Llave
Clé ajustable
Basin Wrench
Llave para Instalar Grifos
Clé pour lavabo
(2) 1/2 in Supply Lines
(2) Líneas de Suministro de ½ plg
2 canalisations de 1.25
cm (1/2 po)
Goggles
Anteojos protectores
Lunettes de sécurité
S
INGLE HANDLE TUB & SHOWER
Model 873-0027H2 873-0001 873-0004 873-0009
873-0016 873-0027
BAÑERA Y DUCHA DE UNA LLAVE
M
odelos
8
73-0027H2 873-0001 873-0004 873-0009
873-0016 873-0027
ROBINET À UNE POIGE POUR BAIGNOIRE ET DOUCHE
Modèles
873-0027H2 873-0001 873-0004 873-0009
873-0016 873-0027
English
HELP LINE
If you need installation assistance,
replacement parts, or have questions
regarding our warranty, please call our
Product Consultants at:
1-877-580-5682
CAUTION-TIPS FOR REMOVAL OF OLD
FAUCET:
Always turn off water supply before
removing existing faucet or replacing
any part of the faucet. Open the faucet
handle to relieve water pressure and
ensure that water is completely shut off.
CARE INSTRUCTIONS:
To preserve the finish of your faucet,
apply non-abrasive wax. Any cleaners
should be rinsed off immediately. Do not
use abrasive cleaners on the faucet.
Español
LÍNEA DE AYUDA
Si necesita ayuda para la instalación,
piezas de repuesto o tiene alguna
pregunta relacionada con nuestra
garatía, por favor llame a nuestros
asesores de producto al:
1-877-580-5682
CONSEJOS PREVENTIVOS PARA
QUITAR EL GRIFO VIEJO:
Siempre corte el suministro de agua antes
de retirar el grifo actual o remplazar
cualquier pieza del mismo. Abra la llave
del grifo para liberar la presn de agua y
asegurar que ya no corre agua.
INSTRUCCIONES DE CUIDADO:
Para preservar el acabado de su grifo,
aplique cera no abrasiva. Se debe enjuagar
completamente todo producto de
limpieza. No use limpiadores abrasivos en
el grifo.
Français
SERVICE À LA CLIENTÈLE
Pour obtenir de l'aide pour l'installation,
le replacement de pièces ou pour toute
question concemant notre garantie,
appeler un de nos scialistes
des produits:
1-877-580-5682
MISE EN GARDE CONSEILS POUR
LE RETRAIT DE L’ANCIEN ROBINET:
Fermez toujours lalimentation en eau avant
de retirer un robinet ou d’en remplacer
des pièces. Tournez la poige du robinet
pour lirer la pression et vous assurer
que l’alimentation en eau est coue.
DIRECTIVES D'ENTRETINE:
Pour préserver le fini de votre robinet,
appliquez-y de la cire non abrasive.
Rincez immédiatement tout produit net-
toyant utilisé. N’utilisez pas de nettoy-
ants abrasifs.
You may need/
Usted puede necesitar/
Aticles dont vous pouvez avoir besion
11
Page view 0
1 2 3 4 5 6 7

Summary of Contents

Page 1 - Usted puede necesitar/

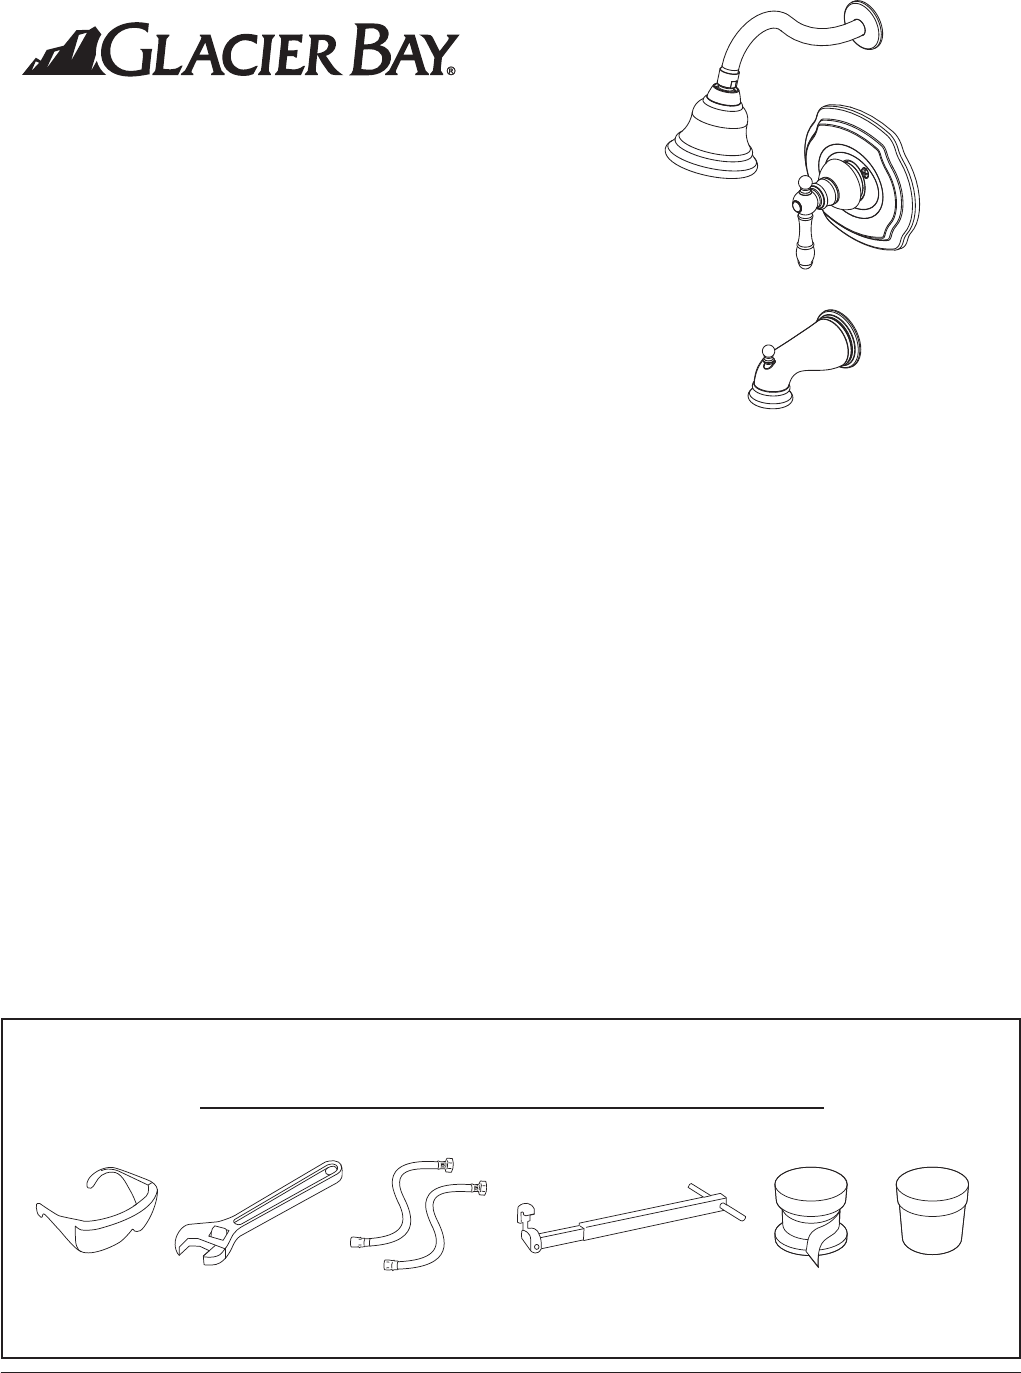
Masilla para TuberíasMastic de plombierPlumber's Putty Sealant Tape Cinta SelladoraRuban d'étanchéitéWrenchLlaveClé ajustableBasin WrenchLla

Page 2 - " Diam

21 2SHUT OFF WATER SUPPLY.Vertify that the hole sizes and positions in the wall are corrected.Recommended component measurementsA. Shower and / or spo

Page 3

33 4FLUSHINGFor Tub and Shower Combinations: Turn on Hot and Cold water supply lines allow-ing water to flow from tub spout outlet (3A) until

Page 4

465FOR TUB SPOUT INSTALLATIONInstall tub spout. Thread spout onto threaded connection clockwise until thespout becomes flush with the finished wall.Th

Page 5

5109Install escutcheon (9A) onto valve then screw (9B) it in the body and install han-dle (9C) assembly. Attach showerhead (9D) to shower arm.Thread s

Page 6 - Précisez le Fini

6* Specify FinishEspecifíque el AcabadoPrécisez le FiniRP38001* Shower FlangeRP38001* Ribete de duchaRP38001* Bride de doucheRP20006 CartridgeRP20006

Page 7

7Glacier Bay Faucets-Limited Lifetime WarrantyGlacier Bay Faucets products are manufactured under the highest standards of quality and workmanship. Gl

Comments to this Manuals

No comments